
How do you draw the human skeleton for figure drawing? Beginners should practice three things. First, break the body into geometric forms: use one head length as the unit of measurement and read the skull as a sphere and the ribcage as a halved coffee bean. Second, treat the body as transparent, using the centerline and cross-section contour lines to read how the torso and limbs rotate. Third, compare landmarks against each other to place every part. Each key is explained below with practice diagrams.
I Know I Should Practice Body Structure, But...
Have you ever had this experience while drawing? You finish a figure painting, your heart is full, and you can't wait to share it — so you post it online. And then you're met with merciless fire like this:

Under that kind of bombardment, you often end up completely deflated, not wanting to draw the next picture at all.
Of course, when we put work online, we'll inevitably run into some sharp-tongued, impatient attacks. But if we understand structure practice more deeply, we can avoid much of this unnecessary grief when we draw.
Which raises the next question: how exactly do you practice? Today, let's talk about a few key points beginners must know when practicing body structure.
Break the Body into Geometric Forms
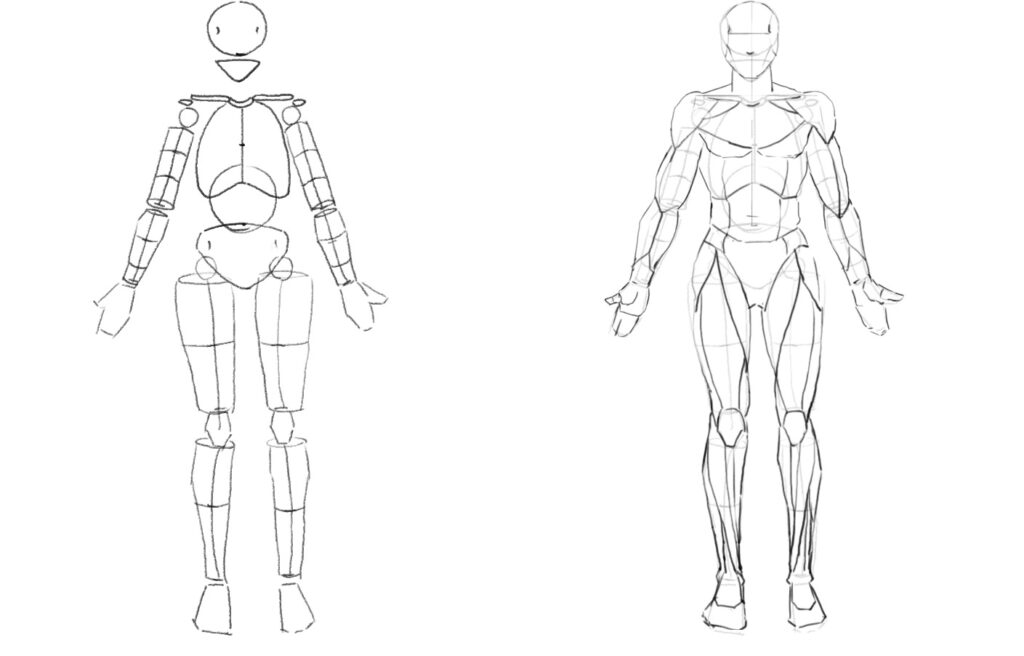
At the beginner stage, to understand how to draw the human body, I recommend starting with a completely still, upright pose like this. In this exercise, we usually take one head length as the basic unit of measurement for the figure. Measuring the whole body this way, the relationships between limbs can be pinned down clearly through comparison. For example, counting down four head lengths from the top of the head lines up with the lower edge of the pelvis; and the tenth rib — the lowest edge of the ribcage — sits just slightly above the elbow when the arm hangs down... and so on. All of these can be found by comparing one landmark against another.
Once I understand the body's basic proportional relationships, when drawing the figure I usually think of it as a set of much simpler objects.
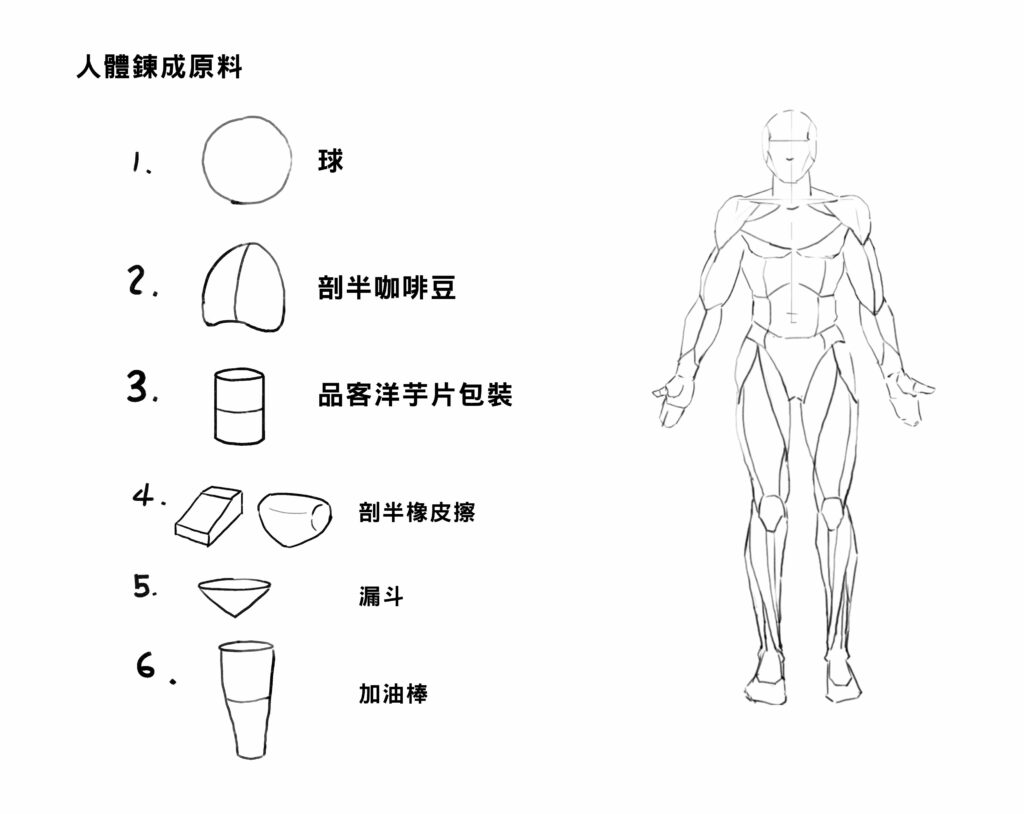
For example, the head: the upper part of the skull can be understood as a sphere, and the chest and ribcage as a halved coffee bean. Deconstructing the body this way, drawing a static figure is no longer a problem. But what makes the human body so captivating is its dynamic beauty — so when the body moves, how do we capture that sense of space on paper? That brings us to the second key point: treat the body as transparent.
Treat the Body as Transparent

You've probably seen a transparent globe like this. When drawing the figure, I often view the body the same way — as a transparent object crossed by many lines of latitude and longitude.
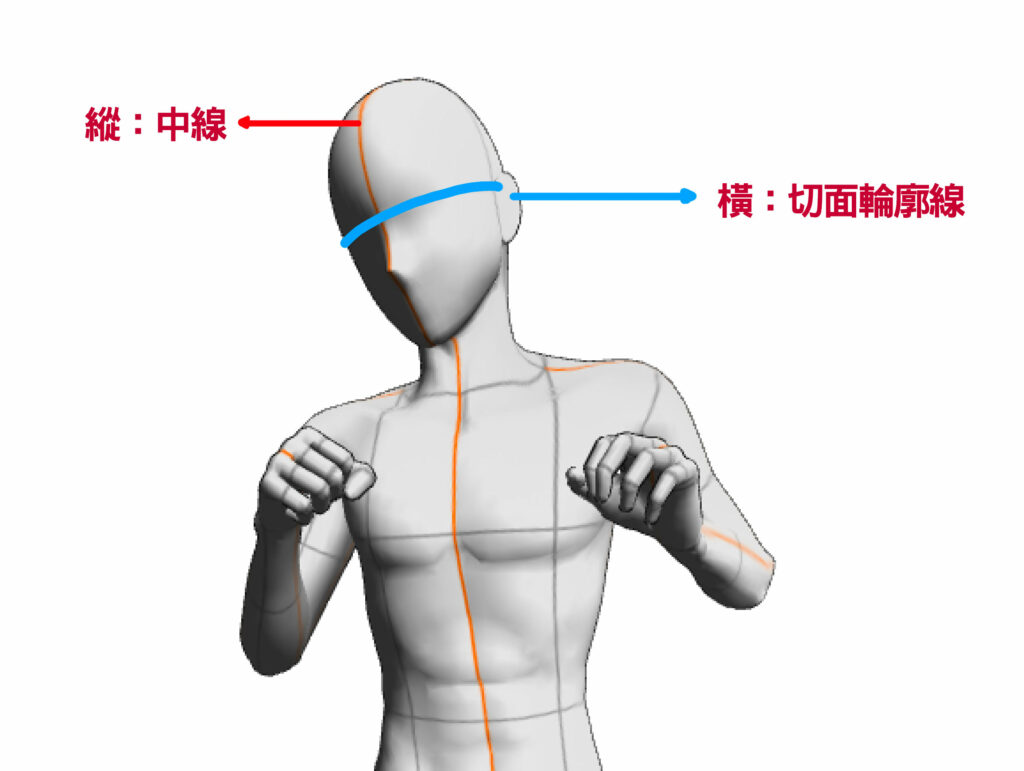
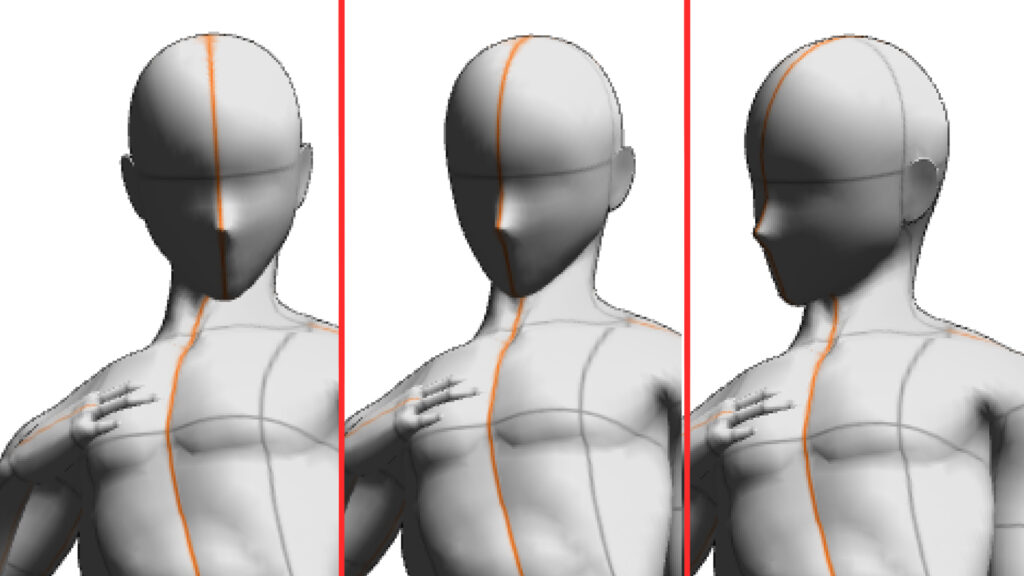
This is the built-in mannequin system in Clip Studio — by rotating it and switching camera angles, it helps us understand the body from every direction. A very convenient tool. Notice that this mannequin is covered with criss-crossing lines, just like the wireframe globe we mentioned. On this "globe of the body," two kinds of lines are essential to know: the centerline and the cross-section contour line. These two invisible lines help us judge, on a flat surface, how the limbs and body are rotating. In the example above, reading the figure from left to right feels like watching the head turn toward its right side, and you can see the head's centerline gradually shifting toward the figure's right as it turns. So we can use the centerline's position to judge a figure's horizontal rotation. And the differences in rotation between the head, chest, and pelvis — the body's three great masses — are a major key to the torso's dynamism when we draw figures.
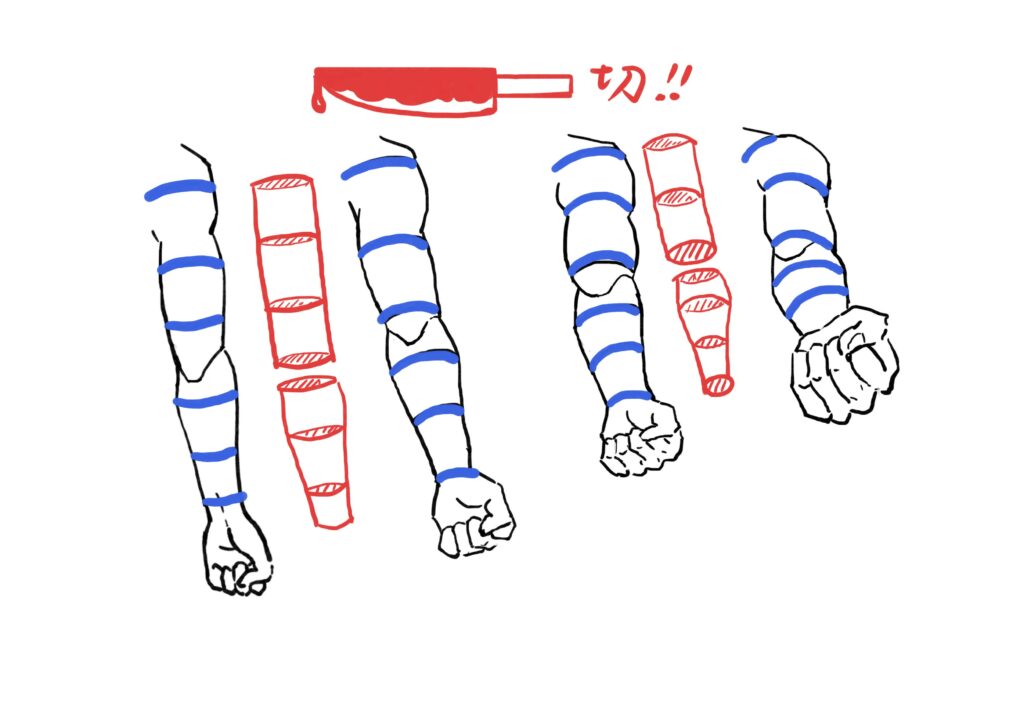
Cross-section contour lines are guide lines expressing a limb's cross sections — a crucial concept for conveying limb perspective. In the image above, the cross-section lines act like a knife slicing the arm into four pieces. After slicing, try rotating the arm upward: the higher it lifts, the more the section lines curve upward. From this observation we learn that when an arm rises above our eye level, its section lines form upward-bending parabolas; conversely, when a section line sits below our eye level, it curves like a smile. With the centerline and cross-section contours as aids, sketching the sense of limbs receding or projecting in space on flat paper becomes much easier.
Compare Landmarks Against Each Other for Placement
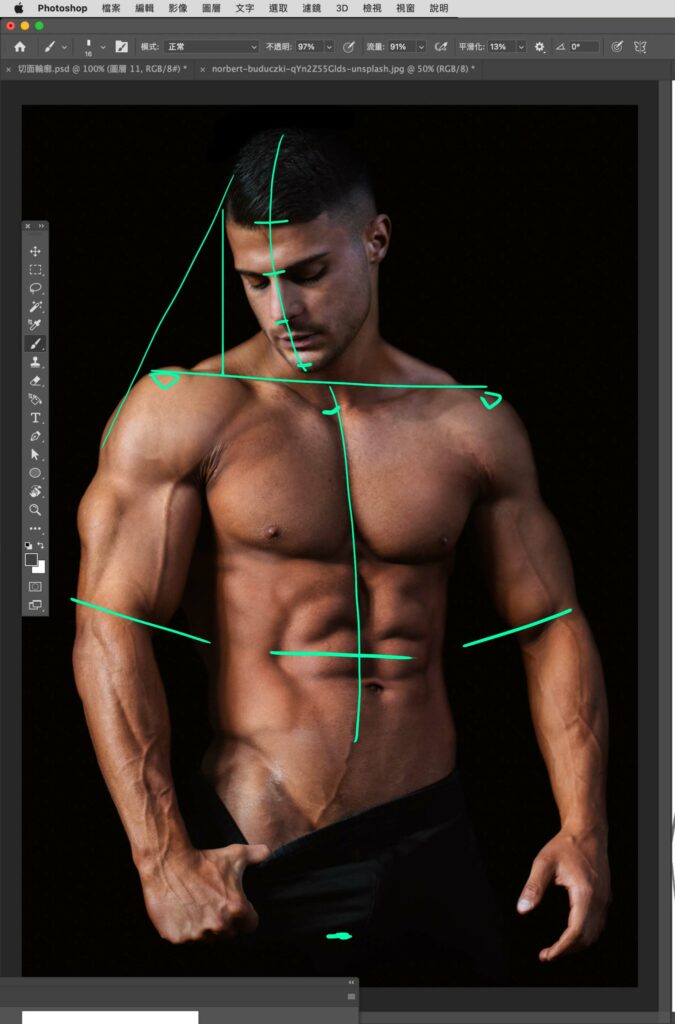
When drawing people, every part of the body can serve as a reference point. Take the image above: while doing a study, green lines like these appear in our mind to help us find positions — dropping a vertical from the forehead lands about where on the collarbone; angling outward from the forehead at roughly what slope lines up with the shoulder peak... and so on. These lines don't exist in space, but we can draw these nonexistent lines ourselves to accurately locate each part of the subject. So to learn body structure, beyond theory, training your observation matters greatly. Sharpening your sense of what to observe while drawing is, I think, one of the biggest keys to doing studies well.
Those are the key points I believe beginners should note when learning body structure. If you'd like to learn more, check out "Photoshop Digital Painting - Ink-Style Characters" on our site, or "Corel Painter Grayscale Character Painting | Draw Dynamic Character Illustrations" on Yotta — both include chapters on figure structure, for your reference. The concepts described above are also covered in video form on our YouTube channel "WeiChen Studio 維真電繪筆記" — the link is below. I hope it helps your digital painting. That's it for these structure-learning tips for beginners — thank you, everyone!
https://www.youtube.com/watch?v=mPr5YuTRo9c&t=11s&ab_channel=%E7%B6%AD%E7%9C%9F%E9%9B%BB%E7%B9%AA%E7%AD%86%E8%A8%98
FAQ
Where should a beginner start practicing the human skeleton?
Start with a completely still, upright figure. Use one head length as the basic unit and compare landmarks: four head lengths down from the top of the head lines up with the bottom of the pelvis, and the lowest edge of the ribcage sits just above the elbow of a hanging arm. Once static proportions are solid, move on to figures in motion.
Why do my figures always look off, even after studying anatomy?
Usually because the parts were drawn without being compared to each other. Treat every landmark as a reference point: where a vertical dropped from the forehead meets the collarbone, or what angle from the forehead lines up with the shoulder peak, and draw those invisible guide lines yourself. Learning structure takes observation training, not just theory.
How do I capture depth when the figure is in motion?
Treat the body as transparent. Use the centerline to read how the head, chest, and pelvis rotate horizontally, and use cross-section contour lines to show a limb's perspective: they curve upward when the limb rises above eye level and curve like a smile below it. Clip Studio's built-in 3D mannequin lets you watch both kinds of lines from any angle.