How do you draw eyes? Treat the eye as a structure, not an outline: understand how the eyeball sits in the socket and why the eyelid has thickness, block the shape with light straight lines, draw both eyes at the same pace, and let both eyes focus on the same target. This guide walks through those four steps with structure diagrams and points out the mistakes beginners make most often.
Eyes — Windows of the Soul: an Old Cliché, but an Apt One
Previously we shared the basics of body structure through a sketching walkthrough. Next I'd like to talk about the fundamentals of drawing facial features. Let's start with how to draw eyes!!
Eyes are the most important part of a character's expression. A good gaze often elevates a character's whole presence. So as we begin with facial features, let's take the eyes as our entry point and talk through how to draw them.
The Structure of the Eye
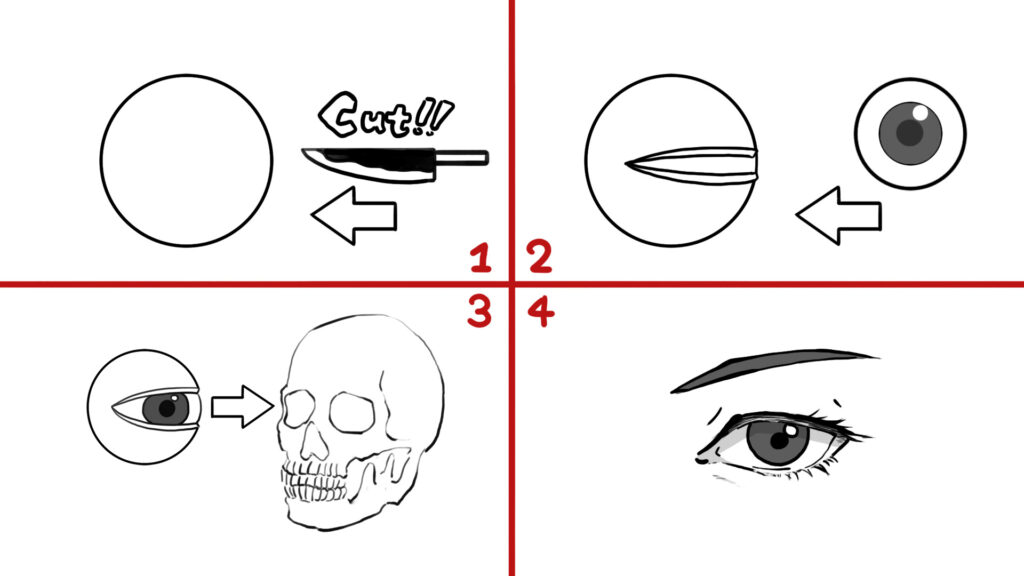
As we've mentioned before, whenever you draw something complex, the first step isn't refining — it's breaking it down. So let's break down the eye!
If we treat the eye as a model kit, the image above is its assembly guide. Seen from the skull's perspective, the eyeball fits into the spot marked by arrow 3 — a structure we call the orbit. The breakdown steps are: 1. Take a hollow ball and cut it open with a knife. 2. Insert a ball of roughly equal volume. 3. Fit the finished part into the orbit. 4. Done.
Observing the breakdown above gives us several structural takeaways:
1. The eyelid has thickness — it's not just a line
2. Because an eyeball is inserted, the eyelid crease and the aegyo-sal (under-eye fullness) form
3. Eyelashes grow on the outer edge of the eyelid, not inside it
4. The upper part of the eye carries a more pronounced shadow because the upper eyelid shades it
So through simplification and observation, we arrive at the takeaways above — giving us a much clearer structural understanding when we draw eyes.
Block the Shape with Firm, Straight Lines — Don't Start with Curves
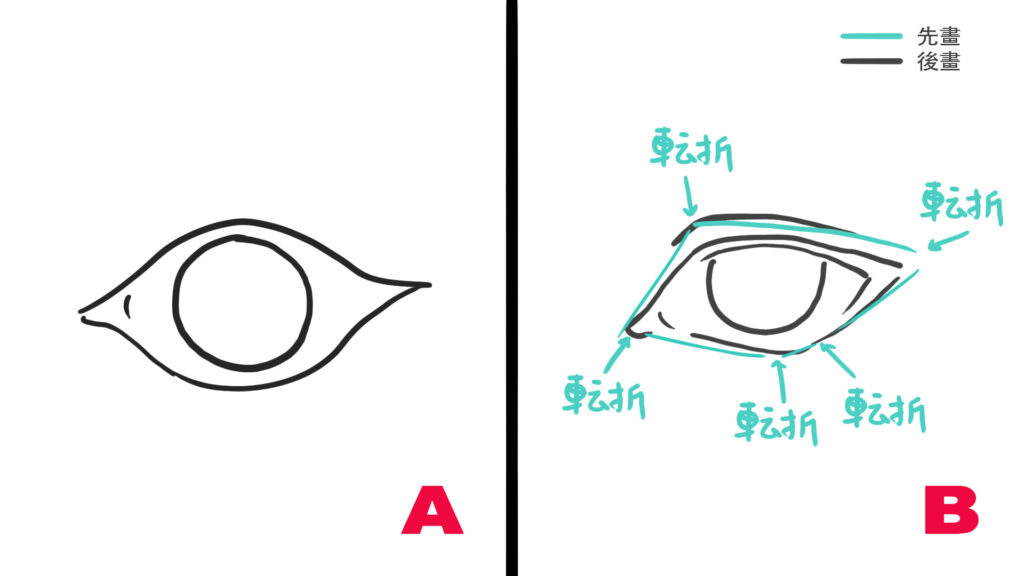
Here are two shapes — take a look. Let me pose a question: which of the eyes above looks like it was drawn by a beginner? In my teaching experience, eye A is usually closer to what beginners draw.
Generally, people with some drawing experience don't start a sketch by tracing curvature with bendy lines. When you block a curved line with a single flowing curve from the start, it's easy to miss the turning points — you never really observe where the line's slope begins to change. So no matter the subject, curved lines are first laid in lightly as firm, straight strokes, breaking the stroke at each turning point before starting the next segment, and only at the end tidying the line with more deliberate strokes.
Eyes are the same: block the shape lightly with lines first, then clean it up at the end.
Draw Both Eyes at the Same Pace
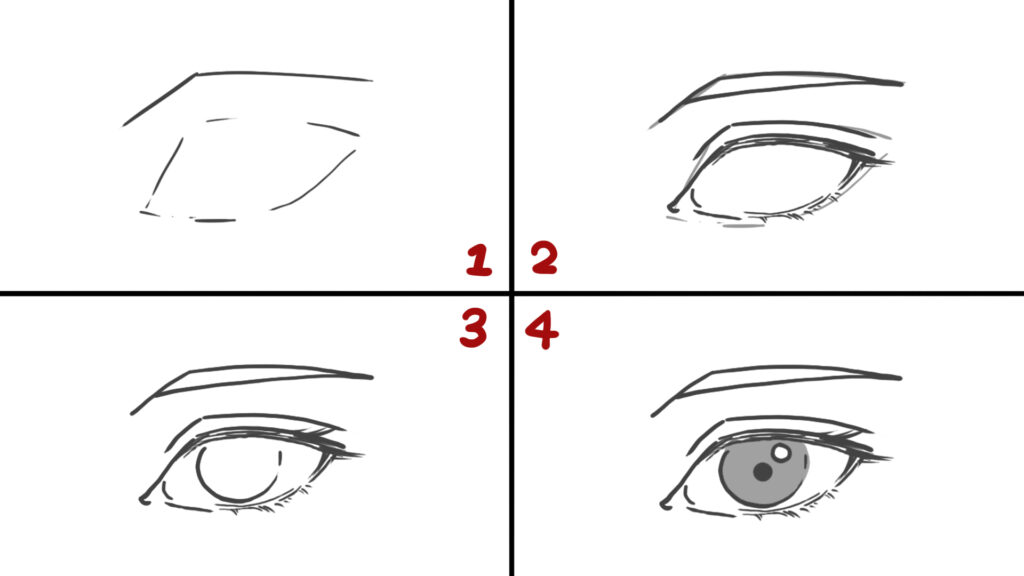
You've probably had this experience: sometimes while drawing, a surge of divine inspiration fills your hand, and you pour all your firepower into rendering the one spot that's most fun to paint. When the inspiration fades and reason returns, you realize — "oh no, what about everywhere else?"
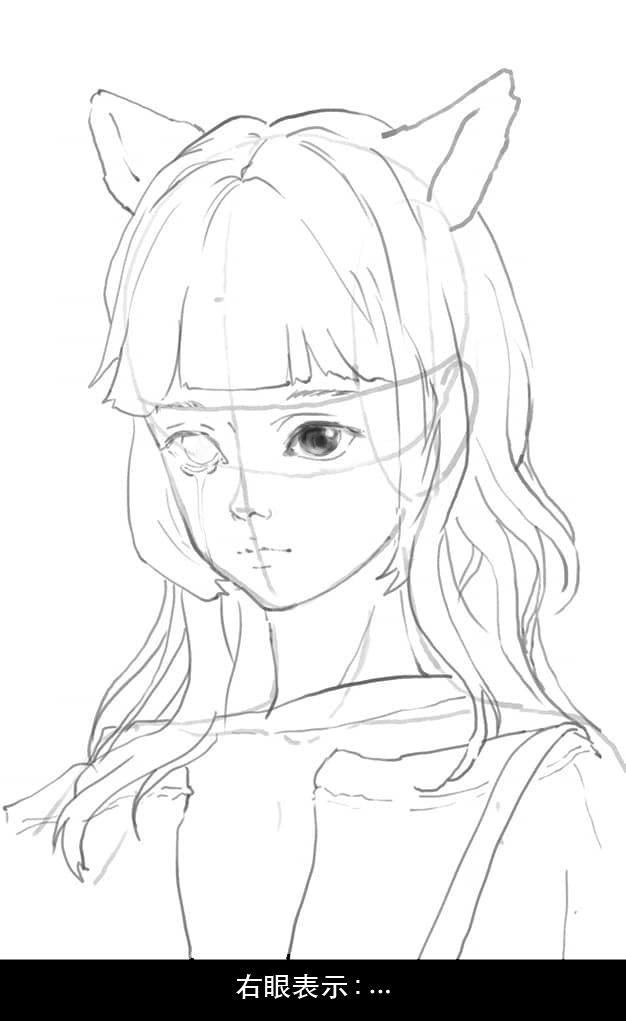
This happens to artists all the time, especially with symmetrical structures like eyes. To avoid it, work on the same step on both sides as you go. For eyes, I split the steps into placing the position, confirming the lines, and painting the iris. Wherever the left eye's progress is, the right eye keeps up. Sometimes I also flip the canvas horizontally to check the balance. Break the drawing into steps and do what each stage calls for. Stepping back from the image at appropriate moments, rather than sinking too emotionally into it — I think that's the emotional discipline needed in the early-to-middle stages of a drawing. Below are the rough steps I use when drawing eye line art, for your reference.
Focusing the Gaze
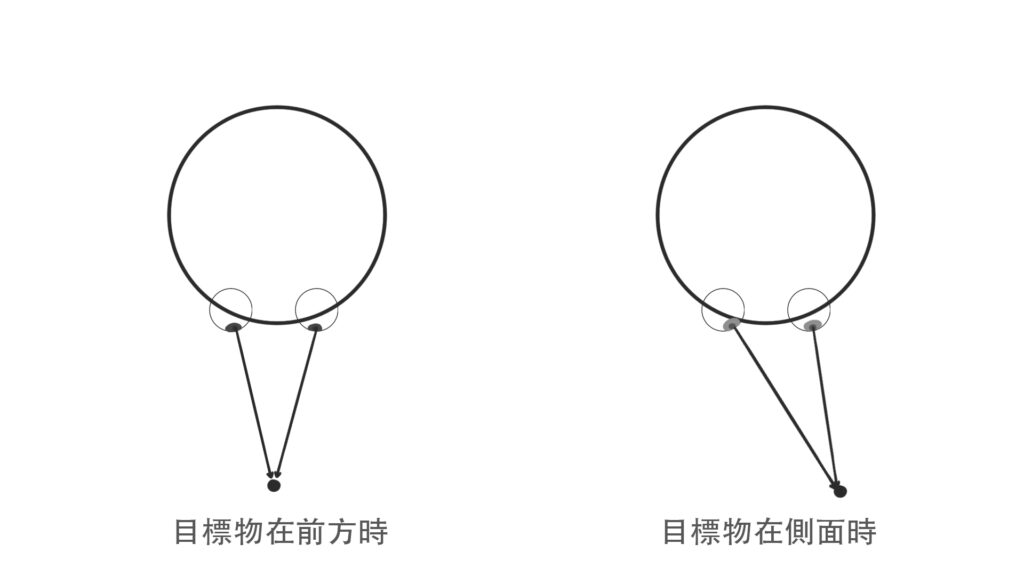
This is one of the trickier problems for beginners. Where the eyes are looking matters enormously to a character's expression. When drawing eyes, if you're not sure where they should look, try letting them look toward the camera first! That's the gaze viewers find easiest to interact and resonate with.
A focused gaze comes from both eyes fixing on the same target. The image above shows, from directly over the character's head, how the eyeballs rotate when we look at things. When looking straight ahead, you can see the irises gather toward the center — toward the bridge of the nose. So what happens when the target moves to the character's side? As the image on the right shows, when the target moves sideways, the eye farther from the target rotates closer to the corner than the nearer eye does. From this we learn: when drawing a character face-on, I pull both eyes slightly toward the bridge of the nose so the gaze feels more focused. And when the face turns slightly to the side, the eye nearer the camera moves a little further from its corner — the two eyes aren't spaced identically. Below are two examples you can compare.
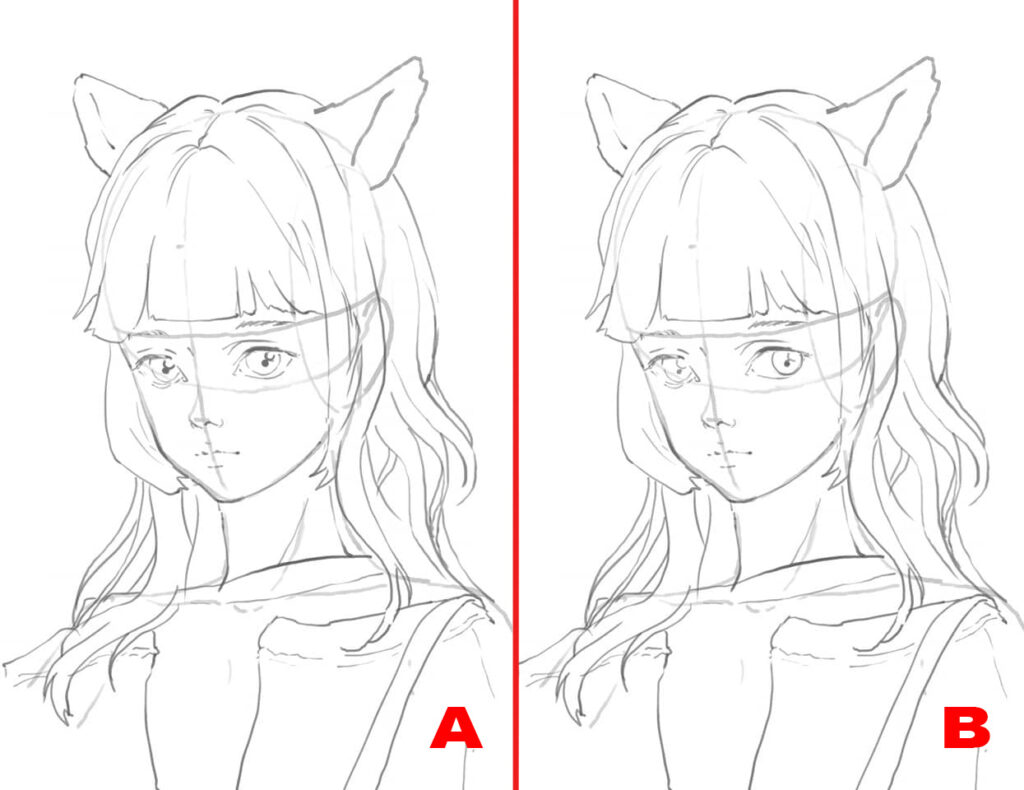
Those are a few small tips for drawing eyes — simple and easy to understand, right? If you'd like more tricks for drawing characters, check out our online digital painting courses "Ink-Style Characters", "Corel Painter Grayscale Character Painting | Draw Dynamic Character Illustrations" and "[WeiChen Studio] Photoshop Digital Painting Techniques - Western-Style Character Design
. In these courses we've gathered a wealth of experience on painting characters digitally. If you love digital painting and enjoy our sharing, you're welcome to join us — let's draw and improve together. That's it for these eye-drawing tips. Thank you, everyone!
FAQ
Why do my eyes look uneven or asymmetrical?
Usually because one eye gets fully rendered before the other is even placed. Split the work into placing the position, confirming the lines, and painting the iris, and keep both eyes at the same step. Flip the canvas horizontally as you go; any difference jumps out immediately.
Should I start drawing eyes with structure or with lines?
Structure first. Understand that the eyeball sits inside the socket, the eyelid has thickness, and the lashes grow from the eyelid's outer edge. Then block the shape lightly with straight segments, breaking at each turning point, and refine into curves only at the end. Starting with one flowing curve makes it easy to miss the turning points.
How do I make a character's eyes look focused and alive?
Have both eyes look at the same target. If you're not sure where, aim them at the camera, which is the gaze viewers connect with most easily. On a face-on view, pull both irises slightly toward the bridge of the nose; when the face turns, move the eye nearer the camera a little further from its corner.
What should a beginner practice first when learning to draw eyes?
Practice breaking down and blocking in before rendering lashes or color. Three habits matter most: block with straight lines, draw both eyes at the same pace, and keep the gaze focused. Once these are solid, the expression follows naturally; the character courses mentioned above go deeper into the same method.