Light Is a Master Storyteller
Lighting is a subject that fascinates many beginners — yet leaves just as many unsure where to start. Light and shadow are master storytellers. Good lighting brings dramatic beauty to an image and gives it a richer rhythm, so viewers find places to study closely and areas where their eyes can rest. But how exactly do you learn lighting? Here we share several directions beginners can use as entry points.Start with Just One Light in the Scene
 A scene may have more than one light source, depending on the creator's needs. But as earlier articles have said, the first step in solving a problem is to simplify it. So when planning an image, we first set a single light source — this makes the later lighting decisions much easier. I think it's like a play: settle the main storyline and clarify the narrative focus first, and only then weave in side events, so the audience never loses track of what the story is telling.
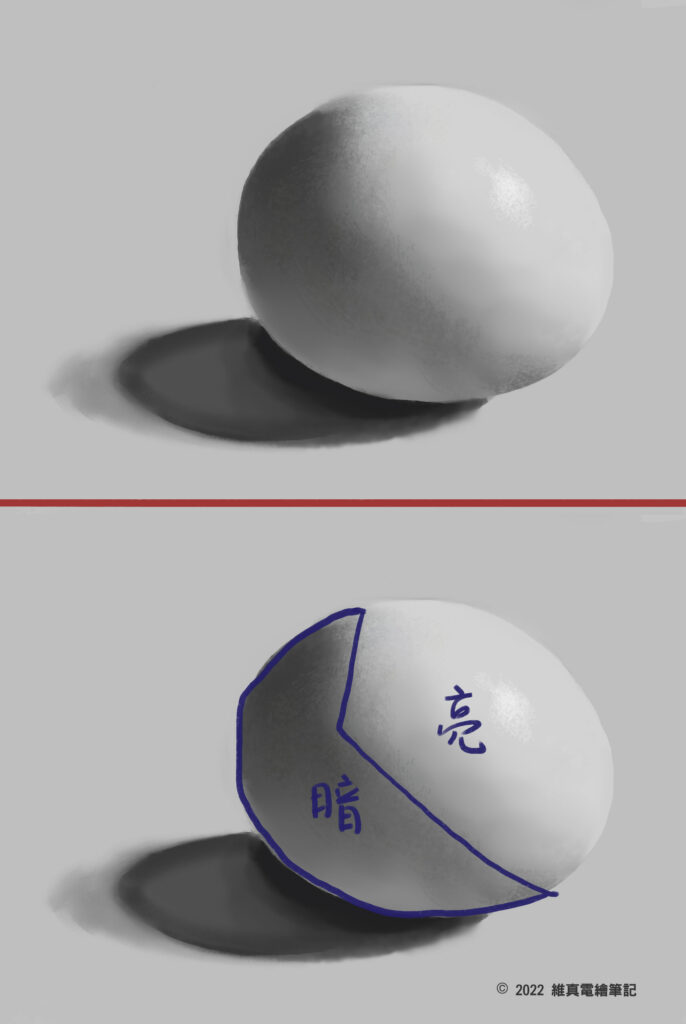
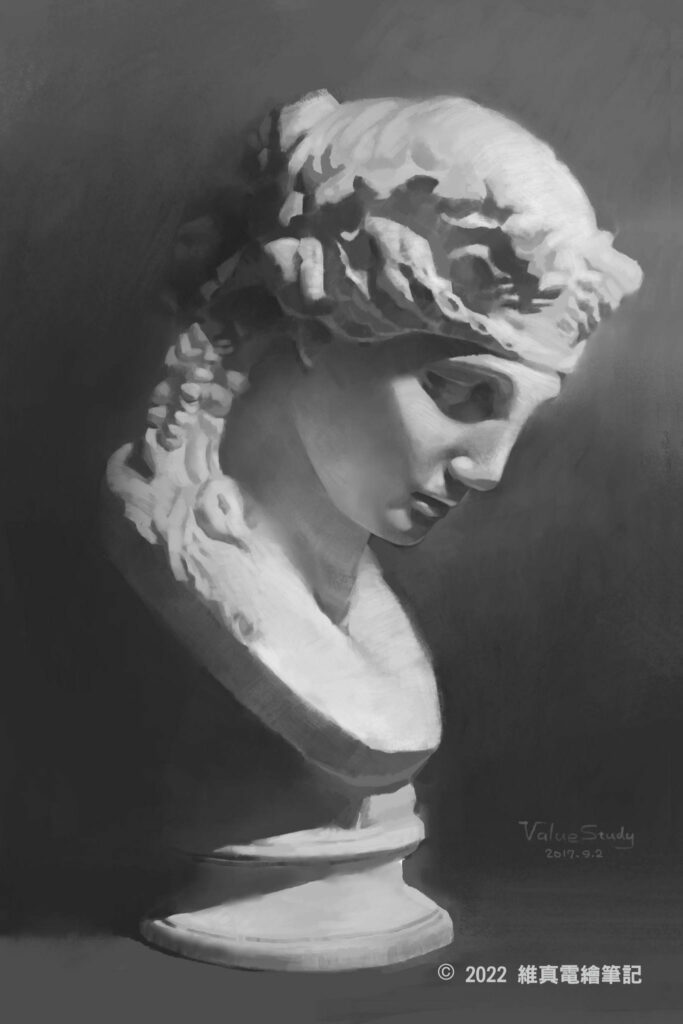
But how do you know what a single light looks like? Take the egg drawing above: with one light, the light-and-shadow distribution splits clearly into bright and dark zones — the lit side is the light zone, the side away from the light is the dark zone. In drawing studies, we first separate light and dark this way, then add midtones for transitions and rendering. Judging and observing light and dark zones is exactly what beginners need to practice. Even with something more complex, like the plaster cast below, we can still accurately judge where the light and dark areas fall. Once you've learned to observe, you can start lighting your own images.
A scene may have more than one light source, depending on the creator's needs. But as earlier articles have said, the first step in solving a problem is to simplify it. So when planning an image, we first set a single light source — this makes the later lighting decisions much easier. I think it's like a play: settle the main storyline and clarify the narrative focus first, and only then weave in side events, so the audience never loses track of what the story is telling.
But how do you know what a single light looks like? Take the egg drawing above: with one light, the light-and-shadow distribution splits clearly into bright and dark zones — the lit side is the light zone, the side away from the light is the dark zone. In drawing studies, we first separate light and dark this way, then add midtones for transitions and rendering. Judging and observing light and dark zones is exactly what beginners need to practice. Even with something more complex, like the plaster cast below, we can still accurately judge where the light and dark areas fall. Once you've learned to observe, you can start lighting your own images.
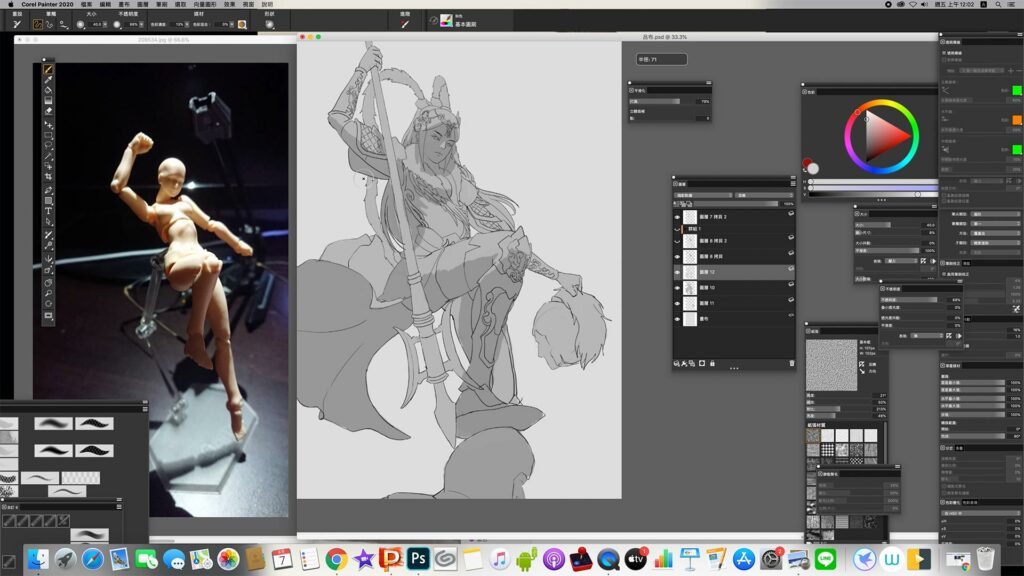
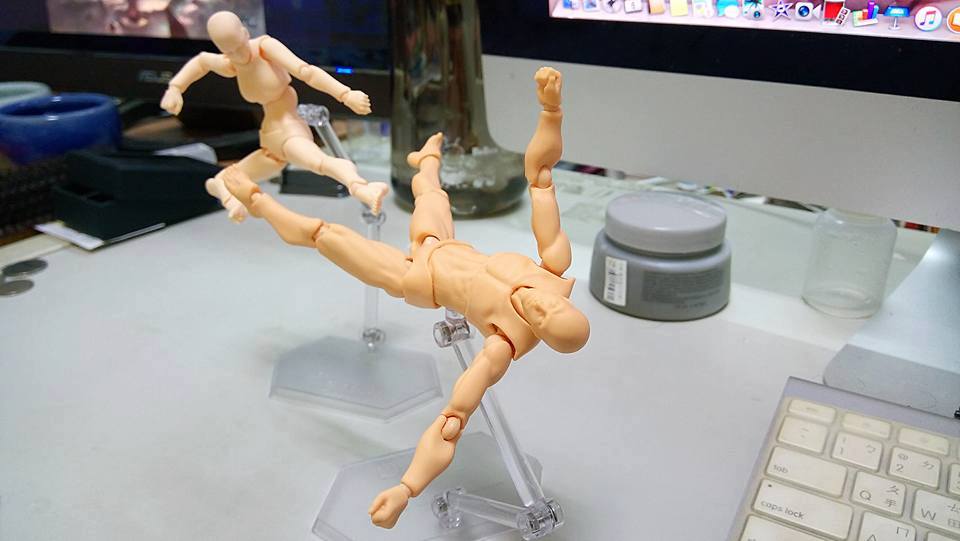 Some learners use figure models like the ones above as pose references. But because of the limits of their joints, experienced artists usually use them for lighting reference instead. Set up a small space, pose the figure, then use a flashlight or another light to try lighting from different directions. Once you've chosen a light you like, that setup becomes your lighting reference. The image below shows the figure reference I used while painting a gender-swapped Lü Bu, along with snippets from the painting process and the final piece, for your reference.
The Right Amount of Light
When learning, we use photos as reference — but choosing reference material is itself something to be careful about. For beginners, I recommend picking references with "the right amount of light." What counts as the right amount? Two criteria guide the choice: first, the boundary between light and dark should be easy to read; second, the structure's details should be preserved. Below, we'll use a few reference photos as examples to explain.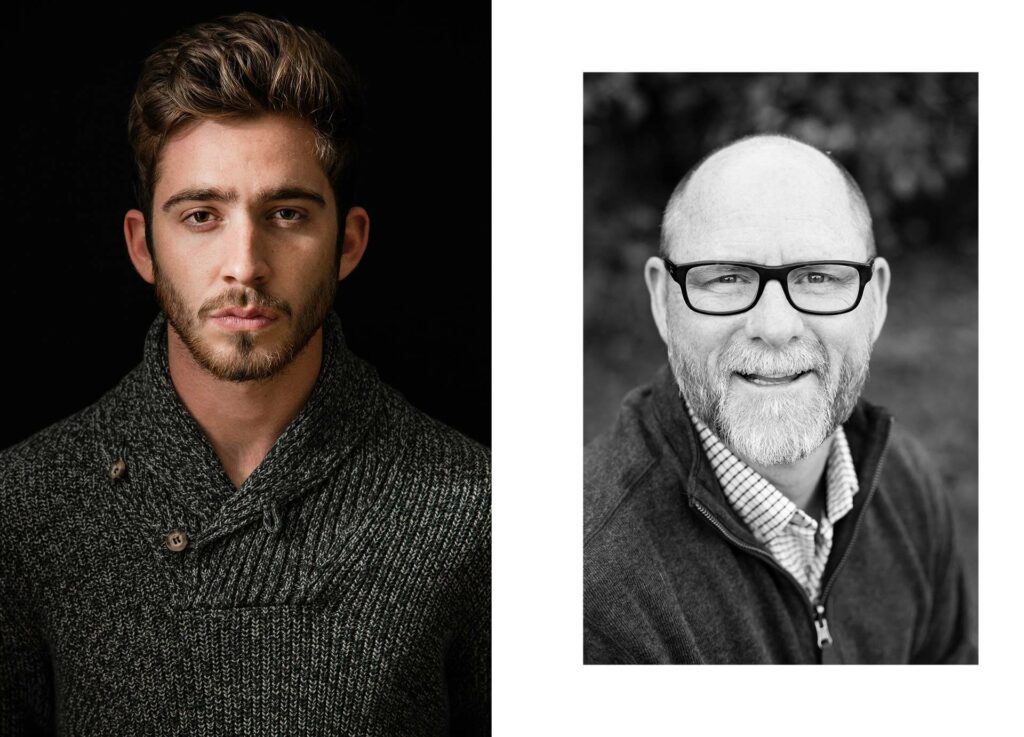 If we're choosing between the two photos above, which would we pick? I'd choose the left one as a lighting reference, because it satisfies both criteria. The person on the right is hit with very strong frontal light — for a beginner, the light–dark boundary is hard to read, and little structural detail remains. That's not a good early-stage choice, so between these two we pick the left.
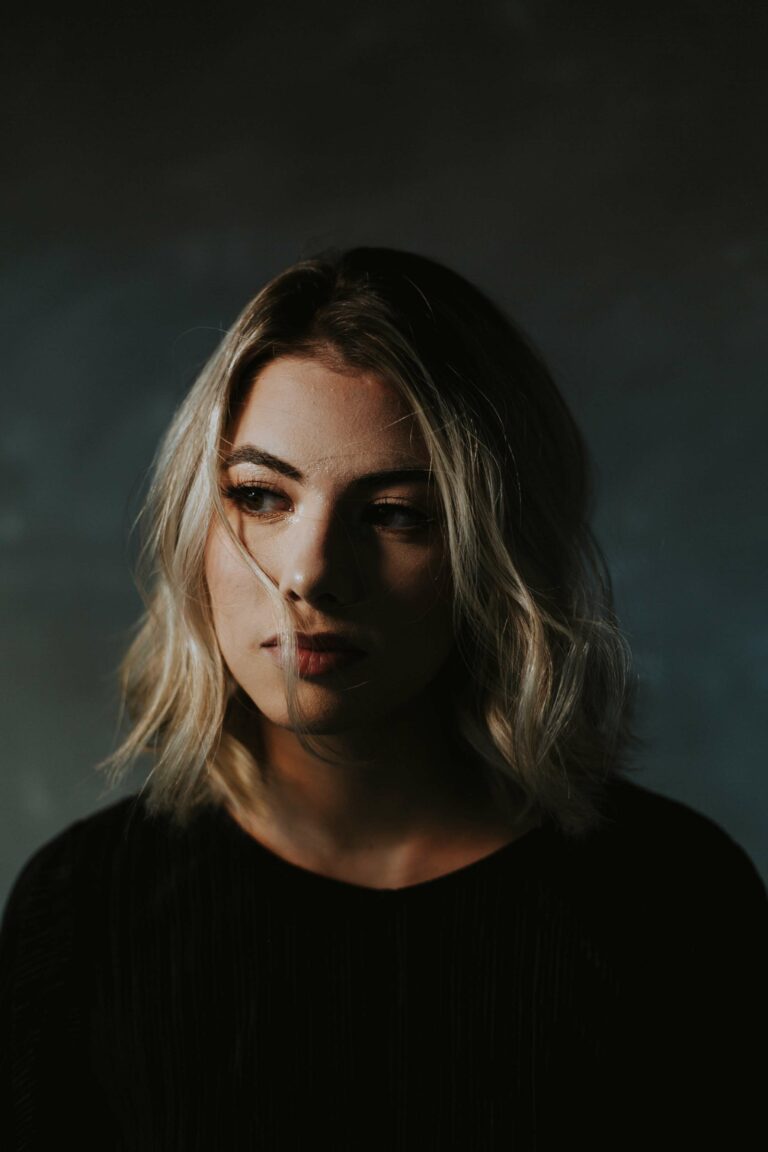
And the photo above is exactly the opposite case: the light–dark split is easy to read, but the lack of bounce or fill light makes the shadow details hard to observe — also not suitable reference material for the beginner stage. So the right amount of light is absolutely something we must weigh when learning light and shadow.
If we're choosing between the two photos above, which would we pick? I'd choose the left one as a lighting reference, because it satisfies both criteria. The person on the right is hit with very strong frontal light — for a beginner, the light–dark boundary is hard to read, and little structural detail remains. That's not a good early-stage choice, so between these two we pick the left.
And the photo above is exactly the opposite case: the light–dark split is easy to read, but the lack of bounce or fill light makes the shadow details hard to observe — also not suitable reference material for the beginner stage. So the right amount of light is absolutely something we must weigh when learning light and shadow.
Judge Shadow Shapes Independently of Outlines — Don't Think in Pieces
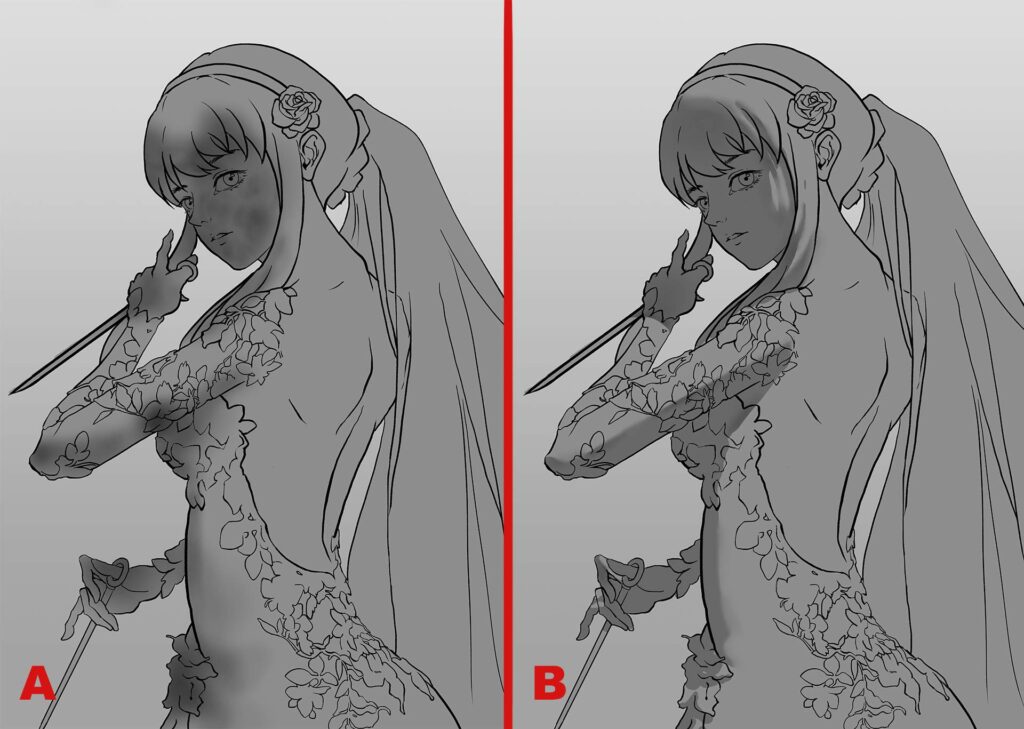
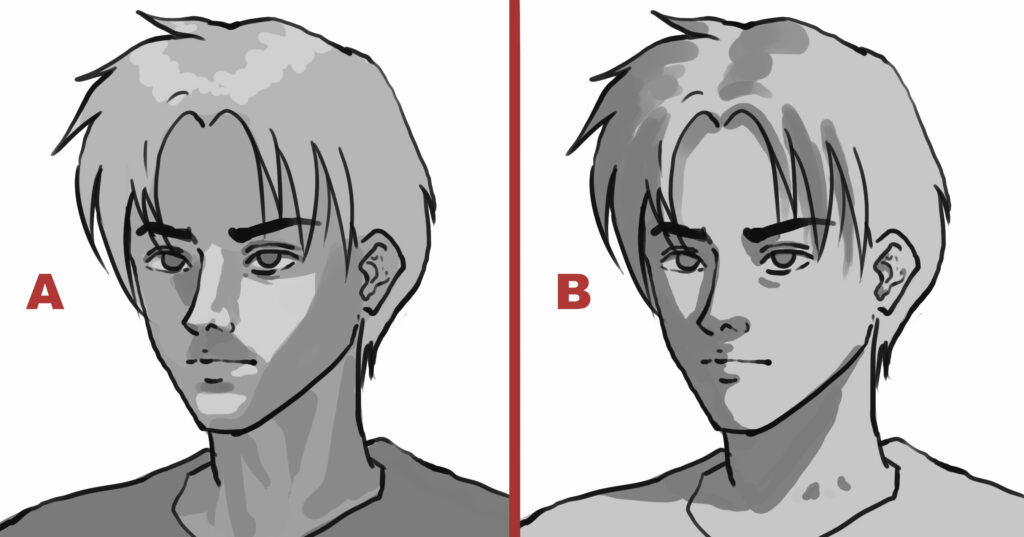 Outlines are the basis for defining structure when we draw. But when painting light and shadow, we must first see the subject as one complete form — don't let outlines split your thinking about the light. For example, in part A of the image above, if you examine each facial feature separately, the nose's volume and the neck's volume each look well done. But viewed together, something feels off — precisely because each part was considered in isolation. By contrast, B treats the head as a single complete form, carefully separating the lit and unlit sides before painting. So when you paint, mentally strip away the lines first, judge with your eyes where the light and dark zones fall, and paint them accurately. Also, in pursuit of a bright, clean look, some people hesitate to leave large, complete shadows when coloring. In truth, large complete masses — whether of light or shadow — are good for building a subject's volume and weight. Try leaving a broad, unbroken shadow area sometimes, and you may find an unexpectedly dramatic effect.